Release Notes
- Range Selection
- Spreadsheet
- Components
- Editing
- Validators
- Clipboard
- Events
- Internal Events
- Keybindings
- Row Selection
- CSS Styling
- Bug Fixes
Range Selection
This release sees the introduction of the new range selection module. This module lets you select a range of cells instead of just a row.
Range selection allows users to select and highlight a block of cells across rows and columns that you can then take action on.
Try some of the following on the table below:
- Select a range - Click and drag across multiple cells
- Navigate the table - Click on a cell and use the arrow keys to navigate round the table
- Expand a range - After selecting a range hold down the shift key and either drag the mouse or use the arrow keys to change the size of the selected range
- Multiple Ranges - After selecting a range, hold down the crtl key and click and drag to select additional ranges.
- Programatically Add Ranges - Click the "Select Range" button to programmatically add ranges with the addRange function.
Compatibility
This module is currently only available with the Virtual renderes and will not work with the Basic renderers
Navigation
The range module allows you to navigate around the table using the arrow keys.
Cell Navigation
When a cell has focus, using any of the arrow keys will cause the selected cell to move one cell in the direction of the arrow key pressed.
Jump Navigation
Holding the ctrl key when pressing an arrow key will cause the focus to skip to the next cell with a value in the direction you are navigating. This will skip any empty cells (if pressent) between the current cell and the next cell with a value.
Expand Navigation
Holding the shift key when pressing an arrow key will expand the current range in the direction of the arrow key pressed.
Jump Expand Navigation
Holding the ctrl and shift keys when pressing an arrow key will expand the current range to the next cell with a value in the direction of the arrow key pressed. This will skip any empty cells (if pressent) between the current cell and the next cell with a value.
Setup
To enable range selection, set the selectableRange option to true
var table = new Tabulator("#example-table", {
	selectableRange:true,
});
The selectableRange option can take one of a several values:
- false - range selection is disabled
- true - range selection is enabled, and you can add as many ranges as you want
- integer - any integer value, this sets the maximum number of ranges that can be selected (when the maximum number of ranges is exceded, the first selected range will be deselected to allow the next range to be selected).
Layout Change
changing the layout or data of the table will result in all ranges being cleared
Selectable Columns
By default you can only select ranges by selecting cells on the table. If you would like to allow the user to select all cells in a column by clicking on the column header, then you can set the selectableRangeColumns option to true
var table = new Tabulator("#example-table", {
  selectableRange:true,
  selectableRangeColumns:true,
});
Header Sorting
You cannot use column header sorting with this option, unless you set the headerSortClickElement option to icon
Selectable Rows
By default you can only select ranges by selecting cells on the table. If you would like to allow the user to select all cells in row by clicking on the first column in a row, then you can set the selectableRangeColumns option to true
var table = new Tabulator("#example-table", {
  selectableRange:true,
  selectableRangeRows:true,
});
A good idea for a row header is to setup a frozen column with the rownum formatter. An example setup for a row header would be:
var table = new Tabulator("#example-table", {
    columns:[
        {resizable: false, frozen: true, width:40, hozAlign:"center", formatter: "rownum"}, //setup row header for spreadsheet
        ... other columns ...
    ],
});
Header Sorting
You cannot use column header sorting with this option, unless you set the headerSortClickElement option to icon
Selection Management
As well as clicking on a row, you can trigger the selection of a range programmatically.
Range Bounds
When creating or editing an existing range programatically, you woill need to define the bounds for the selected area.
The bounds os of a selection are defined using the top-left and bottom-right cells of a selected area, the system can then calculate the cells contained in this boundry by drawing a rectangle between the two points
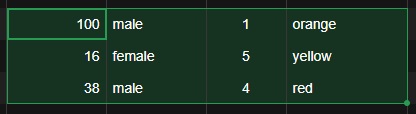
In the example above the top left cell with a value of "100" would be the start bound, and the bottom right cell with a value of "red" would be the end bound.
Add Range
To programmatically select a range of cells you can use the addRange function.
To select a range of cells you should call the addRange function, passing in the Cell Components for the top-left and bottom-right bounds of the selection:
    var topLeft = table.getRows()[2].getCells()[1];
    var bottomRight = table.getRows()[5].getCells()[6];

    var range = table.addRange(topLeft, bottomRight);
This will then return the Range Component for the new range.
Get Selected Range Components
To get the Range Component's for all the current ranges you can use the getRanges function.
var ranges = table.getRanges(); //get array of currently selected range components.
This will return an array of Range Components for all the current ranges.
Get Selected Data
To get the data objects for all the selected cell ranges you can use the getRangesData function.
var rangeData = table.getRangesData(); //get array of currently selected data.
This will return an array of range data arrays, with data array per range. Each range data array will contain a series of row data objects with only the props for cells in that range:
[
    [ //range 1
        {name:"Bob Monkhouse", age:83}, //data for selected cells in first row in range
        {name:"Mary May", age:22}, //data for selected cells in second row in range
    ],
    [ //range 2
        {color:"green", country:"England", driver:true}, //data for selected cells in first row in range
        {color:"red", country:"USA", driver:false}, //data for selected cells in second row in range
        {color:"blue", country:"France", driver:true}, //data for selected cells in third row in range
    ],
]
Clear Data
If you want the user to be able to clear the values for all cells in the active range by pressing the backspace or delete keys, then you can enable this behaviour using the selectableRangeClearCells option:
var table = new Tabulator("#example-table", {
      selectableRangeClearCells:true,
});
By default the value of each cell in the range is set to undefined when this option is enabled and the user presses the backspace or delete keys. You can change the value the cells are set to using the selectableRangeClearCellsValue option:
var table = new Tabulator("#example-table", {
      selectableRangeClearCellsValue:"", // set cleared cells to to an empty string
});
Spreadsheet
While not a new feature in its own right, by using the new range selection functionality in addition to the edit and clipboard modules, you can configure Tabulator to function as a spreadsheet.
Try some of the following on the table below:
- Editing a cell - Double click on a cell or focus on a cell and press the enter key
- Copy a cell - Click on a cell with a value in, press ctrl+c click on another cell and press ctrl+v
- Navigate the table - Click on a cell and use the arrow keys to navigate round the table
- Select a range - Click and drag across multiple cells
- Expand a range - After selecting a range hold down the shift key and either drag the mouse or use the arrow keys to change the size of the selected range
- Copy a range - After selecting a range, press ctrl+c then click on a different cell and press ctrl+v to paste the range starting from that cell
- Paste to fill - Select a cell or range with values in, press ctrl+c then select a different size range (more than one cell) and press ctrl+v. Notice how it pastes the data to fill the range, either duplicating rows and columns as needed, or hiding data that wont fit.
- Duplicating a column - Click on a column header to select a whole column, press ctrl+c, click into another column header and press ctrl+v
- Duplicating a row - Click on a row header to select a whole row, press ctrl+c, click into another row header and press ctrl+v
Components
Row Range Lookup
With the addition of the selectable range module, a new Row Range Lookup option of range has been added, to allow you to use the selected ranges in other table functions
var table = new Tabulator("#example-table", {
    clipboardCopyRowRange:"range", //copy selected ranges to the clipboard
});
This new range lookup option can be used in any table setup option that accepts row range lookups as a value.
Range Component
The addition of the selectable range module also sees the creation of a new type of component object, the range component, this can be used to manipulate the cells selected in a given range. Full details for the range component options can be found in the Range Component Documentation
These component objects are returned from table functions like getRanges or from range based events.
var ranges = table.getRanges(); //get array of currently selected range components.
table.on("rangeAdded", function(range){
    //range - range component for the selected range
});
Update Range Bounds
You can update the bounds for an existing range using the setBounds function, passing in the Cell Components for the top-left and bottom-right bounds of the selection:
    var topLeft = table.getRows()[2].getCells()[1];
    var bottomRight = table.getRows()[5].getCells()[6];

    range.setBounds(topLeft, bottomRight);
Update Range Start
You can change the top left start edge of an existing range using the setStartBound function, passing in the Cell Component for the top left bound of the selection:
    var topLeft = table.getRows()[2].getCells()[1];

    range.setStartBound(topLeft);
Update Range End
You can change the bottom right ending edge of an existing range using the setEndBound function, passing in the Cell Component for the bottom right bound of the selection:
    var bottomRight = table.getRows()[5].getCells()[6];

    range.setEndBound(bottomRight);
Remove Range
You can remove a range by calling the remove function on the range:
range.remove();
Get Element
You can retrieve the bounding rectagle element for a range by calling the getElement function on the range:
var element = range.getElement();
Get Data
You can retrieve the cell data for a range by calling the getData function on the range:
var data = range.getData();
This will return a range data array, which is structured as a series of row data objects with only the props for cells in that range:
[
    {color:"green", country:"England", driver:true}, //data for selected cells in first row in range
    {color:"red", country:"USA", driver:false}, //data for selected cells in second row in range
    {color:"blue", country:"France", driver:true}, //data for selected cells in third row in range
]
Clear Values
You can clear the value of every cell in a range by calling the clearValues function on the range:
var data = range.clearValues();
This will set the value of every cell in the range to the value of the selectableRangeClearCellsValue table option, which is set to undefined by default.
Get All Cells
You can retrieve all the Cell Components in a range by calling the getCells function on the range:
var cells = range.getCells();
This will return a array of Cell Components
Get With Structure
You can retrieve a structured map of all the Cell Components in a range by calling the getStructuredCells function on the range:
var cells = range.getStructuredCells();
This will return a array of row arrays, with each row array containing the Cell Components in order for that row:
[
    [Component, Component, Component], //first row
    [Component, Component, Component], //second row
    [Component, Component, Component], //third row
]
Get Rows
You can retrieve all the Row Components in a range by calling the getRows function on the range:
var rows = range.getRows();
This will return a array of Row Components
Get Columns
You can retrieve all the Column Components in a range by calling the getColumns function on the range:
var columns = range.getColumns();
This will return a array of Column Components
Get Bounds
You can retrieve the bounds of a range by calling the getBounds function on the range:
var bounds = range.getBounds();
This will return an object containing two Cell Components, for the two bounds of the range
{
    start:Component, //the cell component at the top left of the range
    end:Component, //the cell component at the bottom right of the range
}
Get Top Edge
You can find the position number for the top row of the range by calling the getTopEdge function on the range:
var topPosition = range.getTopEdge();
Get Bottom Edge
You can find the position number for the bottom row of the range by calling the getBottomEdge function on the range:
var bottomPosition = range.getBottomEdge();
Get Left Edge
You can find the position number for the left column of the range by calling the getLeftEdge function on the range:
var leftPosition = range.getLeftEdge();
Get Right Edge
You can find the position number for the right column of the range by calling the getRightEdge function on the range:
var rightPosition = range.getRightEdge();
Row Component
Get Ranges
You can retreive all ranges that overlap a row by calling the getRanges function:
var ranges = row.getRanges();
This will return an array of Range Components for any ranges that overlap the row. If no ranges overlap the row, an empty array will be returned.
Column Component
Get Ranges
You can retreive all ranges that overlap a column by calling the getRanges function:
var ranges = column.getRanges();
This will return an array of Range Components for any ranges that overlap the column. If no ranges overlap the column, an empty array will be returned.
Cell Component
You can retreive all ranges that overlap a cell by calling the getRanges function:
var ranges = cell.getRanges();
This will return an array of Range Components for any ranges that overlap the cell. If no ranges overlap the cell, an empty array will be returned.
Editing
Edit Trigger Event
The new editTriggerEvent option lets you choose which type of interaction event will trigger an edit on a cell.
var table = new Tabulator("#example-table", {
    editTriggerEvent:"dblclick", //trigger edit on double click
});
This option can take one of three values:
- focus - trigger edit when the cell has focus (default)
- click - trigger edit on single click on cell
- dblclick - trigger edit on double click on cell
This option does not affect navigation behavior, cells edits will still be triggered when they are navigated to through arrow keys or tabs.
Validators
Alphanumeric Validator
The new alphanumeric validator allows values that are explicitly numbers and letters with no symbols or spaces
{title:"Example", field:"example", validator:"alphanumeric"}
Clipboard
The clipboard module has had several updates to add intergration with the new range selection module
Copy Row Range
The clipboardCopyRowRange option, now accepts the range value to allow copying of cell ranges from the table
var table = new Tabulator("#example-table", {
    clipboardCopyRowRange:"range", //change default selector to selected
});
Range Paste Parser
The clipboardPasteParser option, now accepts the range value to allow pasting of cell ranges to the table
var table = new Tabulator("#example-table", {
    clipboardPasteParser:"range", //use the range parser
});
Range Paste Action
The clipboardPasteAction option, now accepts the range value to allow pasting of cell ranges to the table
var table = new Tabulator("#example-table", {
    clipboardPasteAction:"range", //use the range paste action
});
Events
Range
The addition of the selectable range module also includes a number of new events.
Range Added
The rangeAdded event is triggered when a range is initialy selected, either by the user or programmatically.
table.on("rangeAdded", function(range){
    //range - range component for the selected range
});
Range Changed
The rangeChanged event is triggered when a the bounds of an existing range are changed.
table.on("rangeChanged", function(range){
    //range - range component for the selected range
});
Range Removed
The rangeRemoved event is triggered when a range is removed from the table.
table.on("rangeRemoved", function(range){
    //range - range component for the selected range
});
Internal Events
Edit
New internal events have been added to allow overriding of the default blur behaviour of edited cells.
| Key | Type | Arguments | Response | Notes |
|---|---|---|---|---|
| edit-blur | confirm | cell | returning true will prevent the default blur behaviour | Dispatched when an edit is about to blur the cell focus, to give the opertunity to preven or override this behaviour |
Menu
New internal events have been added to help track when a menu is opened or closed
| Key | Type | Arguments | Response | Notes |
|---|---|---|---|---|
| menu-opened | dispatch | menu, popup | A new menu has been opened | |
| menu-closed | dispatch | menu, popup | A menu has been closed |
Keybinding
A new internal event has been added to help track when a range navigation keybining is triggered
| Key | Type | Arguments | Response | Notes |
|---|---|---|---|---|
| keybinding-nav-range | dispatch | trigger event, direction, jump, expand | A range navigation action has been triggered by a keybinding |
Column
New internal events have been added to track when a column has finished being deleted.
| Key | Type | Arguments | Response | Notes |
|---|---|---|---|---|
| column-deleted | dispatch | column | Column has been deleted |
Alert
New internal events have been added to track when alerts open and close
| Key | Type | Arguments | Response | Notes |
|---|---|---|---|---|
| alert-show | dispatch | type | An alert has been opened | |
| alert-hide | dispatch | type | An alert has been hidden |
Clipboard
New internal events have been added to allow handling of clipboard paste events.
| Key | Type | Arguments | Response | Notes |
|---|---|---|---|---|
| clipboard-paste | confirm | paste event | returning true will prevent the paste event from being handled by the cliboard module | A user has pasted content into the table |
keybindings
Range Keybindings
A number of new default keybindings have been added to aid in range navigation of the table:
| Action | Default Key Combination (keycode) | Function |
|---|---|---|
| rangeJumpUp | ctrl + up ("ctrl + 38") OR meta(cmd) + up ("meta + 38") | Navigate range cursor up to next cell with value |
| rangeJumpDown | ctrl + down ("ctrl + 40") OR meta(cmd) + down ("meta + 40") | Navigate range cursor down to next cell with value |
| rangeJumpLeft | ctrl + left ("ctrl + 37") OR meta(cmd) + left ("meta + 37") | Navigate range cursor left to next cell with value |
| rangeJumpRight | ctrl + left ("ctrl + 39") OR meta(cmd) + left ("meta + 39") | Navigate range cursor left to next cell with value |
| rangeExpandUp | shift + up ("ctrl + 38") | Expand active range up one row |
| rangeExpandDown | shift + down ("ctrl + 40") | Expand active range down one row |
| rangeExpandLeft | shift + left ("ctrl + 37") | Expand active range left one column |
| rangeExpandRight | shift + right ("ctrl + 39") | Expand active range right one column |
| rangeExpandJumpUp | ctrl + shift + up ("ctrl + shift + 38") OR meta(cmd) + shift + up ("meta + shift + 38") | Expand active range up to next cell with value |
| rangeExpandJumpDown | ctrl + shift + down ("ctrl + shift + 40") OR meta(cmd) + shift + down ("meta + shift + 40") | Expand active range down to next cell with value |
| rangeExpandJumpLeft | ctrl + shift + left ("ctrl + shift + 37") OR meta(cmd) + shift + left ("meta + shift + 37") | Expand active range left to next cell with value |
| rangeExpandJumpRight | ctrl + shift + right ("ctrl + shift + 39") OR meta(cmd) + shift + right ("meta + shift + 39") | Expand active range right to next cell with value |
Row Selection
With the addition of the range selection module, all row selection options have now been renamed for clarity.
Enable Row Selection
Anywhere you used the selectable option:
var table = new Tabulator("#example-table", {
    selectable:true, //make rows selectable
});
You should now use the selectableRows option:
var table = new Tabulator("#example-table", {
    selectableRows:true, //make rows selectable
});
Rolling Row Selection
Anywhere you used the selectableRollingSelection option:
var table = new Tabulator("#example-table", {
    selectableRollingSelection:false, //disable rolling selection
});
You should now use the selectableRowsRollingSelection option:
var table = new Tabulator("#example-table", {
    selectableRowsRollingSelection:false, //disable rolling selection
});
Range Mode
Anywhere you used the selectableRangeMode option:
var table = new Tabulator("#example-table", {
    selectableRangeMode:"click", //select row range on click
});
You should now use the selectableRowsRangeMode option:
var table = new Tabulator("#example-table", {
    selectableRowsRangeMode:"click", //select row range on click
});
Persistent Selection
Anywhere you used the selectablePersistence option:
var table = new Tabulator("#example-table", {
    selectablePersistence:false, //disable selection peristence
});
You should now use the selectableRowsPersistence option:
var table = new Tabulator("#example-table", {
    selectableRowsPersistence:false, //disable selection peristence
});
Persistent Selection
Anywhere you used the selectableCheck option:
var table = new Tabulator("#example-table", {
    selectableCheck:function(row){
        //row - row component
        return row.getData().age > 18; //allow selection of rows where the age is greater than 18
    },
});
You should now use the selectableRowsCheck option:
var table = new Tabulator("#example-table", {
    selectableRowsCheck:function(row){
        //row - row component
        return row.getData().age > 18; //allow selection of rows where the age is greater than 18
    }
});
CSS Styling
CSS Classes
A number of new CSS classes have been added to the table with the new range selection module
| Class | Element Description |
|---|---|
| tabulator-ranges | Applied to the table container when range selection is enabled |
| tabulator-range-highlight | Applied to a column header or row when a cell in that column is included in a range |
| tabulator-range-selected | Applied to a column header or row header when that entier row or column is included in a range |
| tabulator-range-row-header | Applied to the row header cell for a row |
| tabulator-range-overlay | The containing element for all range area overlays |
| tabulator-range | The overlayed area graphic for a range |
| tabulator-range-active | Applied to the active range overlay area |
| tabulator-range-active | Applied to the active range overlay area |
SASS Variables
A number of new SASS Variables have been added to the table with the new range selection module
| Variable | Default Value | Description |
|---|---|---|
| rangeBorderColor | #2975DD | Range selection border colour |
| rangeHandleColor | #2975DD | Range selection handle colour |
| rangeHeaderSelectedBackground | #3876CA | Range column header selected backgroud Colour |
| rangeHeaderSelectedTextColor | #FFFFCA | Range column header selected text Colour |
| rangeHeaderHighlightBackground | #D6D6CA | Range column header highlighted backgroud Colour |
| rangeHeaderTextHighlightBackground | #0000CA | Range column header highlighted text Colour |
Bug Fixes
v5.6.0 Release
The following minor updates and bugfixes have been made:
- Updating a column definition to freeze a column now works successfully
- Toggling the visibility of a frozen column will no longer cause a visual glitch
- Column resizing now works for frozen columns
- Table resize functionality now works correctly on mobile devices when the edit module is not installed
- Column header vertical alignment is recalculated after initial data load
- Top column calcks and frozen rows will now correctly render when scrolled horizontally
- Alerts poping up while moving columns now cancle the column move
- History actions now correctly clear and restore the empty table placeholder
- The placeholder is now correctly positioned on tables using the basic renderer
- The selectRow and deselectRow functions now correctly handle rows with an index of 0
- Fixed missing getTable function on psuedo cell component used in export module
v5.6.1 Release
The following minor updates and bugfixes have been made:
- Fixed issues with rendering in range selection module when no row header defined
- Fixed regression in frozen columns module when frozen columns are initially hidden
- Fix issue in time and datetime editors where 24 hour times were not being handled correctly
- You can now use the editableTitle and movableColumns options together without dragging the mouse in the title input causing the column to be moved
- Using events after calling the setHeight function will no longer result console warnings
- Fixed regression that caused text areas to not resize on table resize, introduced during performance improvements in v5.5
- Editors can now only trigger success or cancel calls once (if validation passes) to prevent duplicate events